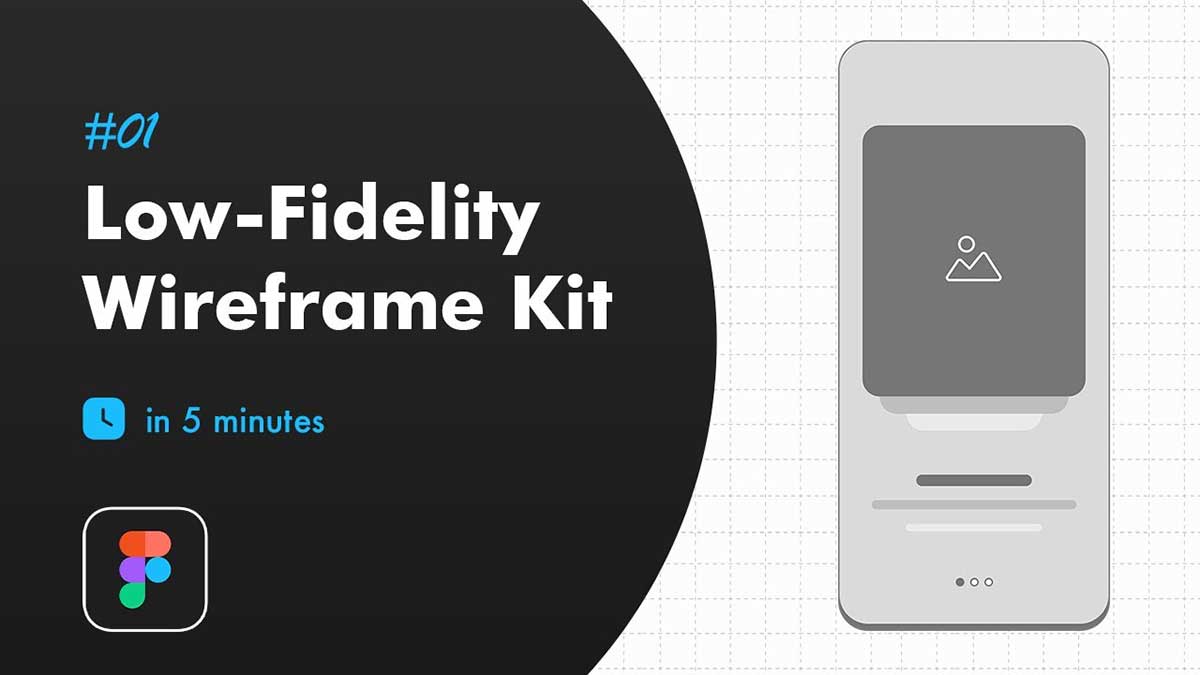
Are you looking to design a mobile app wireframe in Figma? In this first episode of our free wireframing UI/UX design course, we’ll guide you through the onboarding screen wireframe process step by step. Whether you’re a beginner or experienced designer, this tutorial will help you understand the core structure of mobile wireframes and how to convert an onboarding idea into an effective user flow.
This guide is perfect for designers wanting to improve UI/UX skills, boost app engagement, plan user journeys, and create conversion-focused mobile designs.
Why Designing a Mobile App Wireframe in Figma is Important?
Wireframing is the foundation of UI/UX design. It helps visualize the layout, user journey, information structure and flow before UI design begins. A strong wireframe ensures smooth navigation, better usability and a higher probability of user retention.
Benefits of wireframing:
- Clear visual structure before final UI design
- Saves time in design revisions
- Improves user experience & interaction
- Helps build reusable design components
- Reduces complexity with a focused UX approach
What You Will Learn in This Figma Wireframe Tutorial
In this Mobile App Wireframe in Figma tutorial, we will cover:
- The basics of mobile wireframing in Figma
- How to design onboarding screens step by step
- Using UI kits & components to speed design workflow
- User-centric layout structure and spacing rules
- Best practices to increase user retention & engagement
Step-by-Step Guide – Create an Onboarding Mobile App Wireframe in Figma
Step 1 — Setting Up Your Mobile Workspace in Figma
- Create a new frame (iPhone/Android size)
- Add grids for consistent spacing
- Use grayscale colors for wireframing
- Focus on UX before visuals
Step 2 — Structuring the Onboarding Screen Wireframe
- Add logo/title placeholder
- Create image/illustration section
- Add headline + description for guiding users
- Add navigation buttons such as Next, Skip, indicators
Keep spacing clean to avoid cognitive overload for first-time users.
Step 3 — Use Components for Reusability
- Convert repetitive elements into components
- Use Auto Layout for adaptability
- Name layers for better workflow
This helps scale multiple screens rapidly with consistency.
Figma Walkthrough – Full Onboarding Flow with UX Psychology (Important for Ranking)
To design an effective onboarding flow:
- Present information gradually rather than all at once
- Use progress indicators for step-by-step walkthrough
- Keep CTA buttons thumb-zone-friendly
- Reduce friction to improve completion rate
- Use user psychology principles such as clarity, minimal text & short steps
If your app includes premium access, you can introduce a paywall screen later in the flow after trust has formed.
Example onboarding sequence:
- Welcome / intro screen
- Feature highlights screen
- User benefits walkthrough
- Optional subscription/paywall preview
- Account creation or success screen
This section directly strengthens your ranking for the long-tail query you discovered 👌
Improve Engagement with Smart UX Techniques
- Add micro-copy to guide new users
- Use contrast to draw attention to CTA
- Avoid overwhelming users during onboarding
- Keep text minimal — show, don’t tell
- Review user flow for drop-off points
What’s Next After This Wireframe?
This is Episode #1 of the UI wireframing journey. In upcoming lessons, we will move toward:
- Multi-screen flow development
- Wireframe refinements & interactions
- Transitioning into high-fidelity UI
- Preparing UI components for a full design kit
Stay tuned for more mobile app UI/UX tutorials!
Watch the Full Tutorial
Check out the full video tutorial on YouTube to see the step-by-step process in action and learn how to design a conversion-focused mobile app wireframe in Figma.
Want a hands-on demonstration? Watch my YouTube tutorial to learn Figma, UI/UX design for mobile app ui, Check out 100 days daily ui challenge for simple and easy beginner tutorials!